commercial roof inspection checklist: 8 must-know items
By Sunrise Roofers LLC · Nov 13, 2025 · 17-27 min read
A commercial roof isn't just a lid on your building. It's a stack of layers all working together to keep the weather off everything you've got inside. A quick look from the parking lot catches the obvious stuff. A real inspection digs into the parts you can't see, the ones that decide how long the roof lasts. Miss a loose fastener or a soft spot in the deck and it doesn't stay small. It turns into a leak over your inventory, downtime, and a capital expense you never budgeted for.
I'm Eddie at Sunrise Roofers. This commercial roof inspection checklist walks through the eight areas every building owner and property manager needs to keep an eye on. No vague advice. You'll get the actual steps, the warning signs, and what a thorough job is supposed to look like, so you can catch the small problems while they're still cheap to fix.
Do this right and you stop chasing leaks after the fact and start staying ahead of them. Out here that's not optional. The Tucson sun bakes a membrane harder than just about anywhere, and when the monsoon hits, every weak seam finds out. This checklist covers all of it, top to bottom, from the membrane on the surface clear down to the deck holding the whole thing up.
1. Roof Membrane Condition Assessment
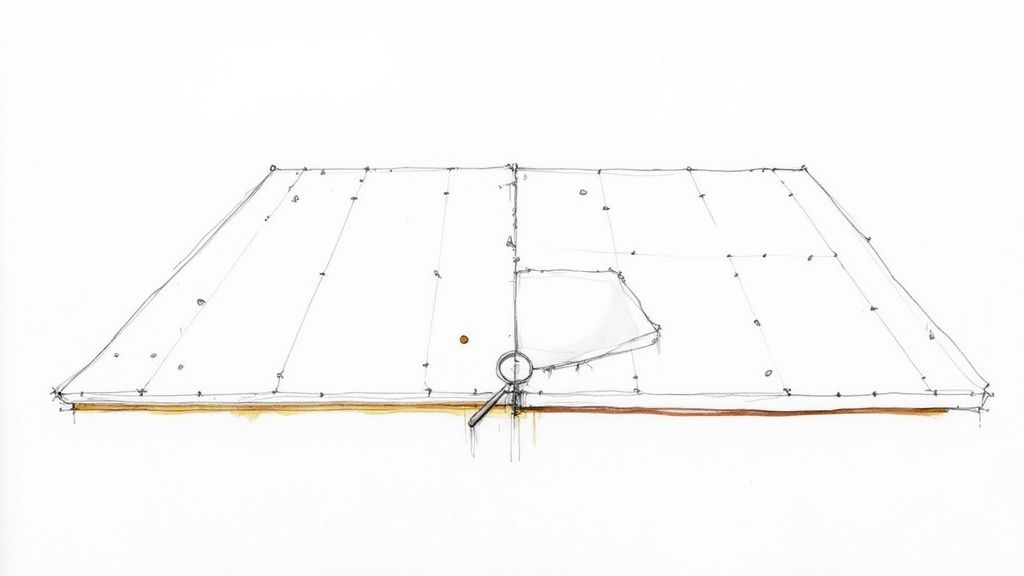
The membrane is the part doing the actual waterproofing, so it's where every good inspection starts. You go over the whole surface, no matter what it's made of, TPO, EPDM, PVC, modified bitumen, whatever's up there, looking for anything that's wearing out or about to give.
What you're hunting for is specific. Cracks. Punctures where something blew across the roof and gouged it. Blisters, which mean water's gotten trapped underneath. And spots where the membrane is lifting or peeling away from what's below it. Catch these early and they're a patch. Miss them and a tiny breach turns into water in the building and a repair bill with a lot of zeros.
Why Membrane Assessment is Non-Negotiable
Ignore the membrane and you're gambling with the whole roof. This is the layer taking the full beating, the UV, the heat that swells it by day and shrinks it by night, every chunk of debris that lands on it. Check it on a schedule and you get ahead of the problems instead of reacting to them after the ceiling tiles are stained.
This isn't just my opinion. Big real estate firms like CoStar Group flag membrane problems in their property condition reports, and it moves the building's value. Insurers like FM Global want a detailed membrane assessment before they'll write coverage, because they know it's the piece that decides whether they pay out a water claim.
Actionable Tips for Membrane Inspection
Here's how to do a membrane check that's actually worth something.
- Pick a dry day: Always inspect when it's dry and clear. A wet surface hides the fine cracks, the small punctures, the seam that wasn't sealed right. Dry, you'll see them.
- Use a thermal camera: Scan the roof with infrared. It picks up the temperature differences where water's trapped under the membrane, stuff your eyes will never catch.
- Take photos and date them: Shoot anything that looks wrong, in good resolution, with the date. You'll use those to track how fast something's getting worse, and you'll need them if you ever file a warranty claim.
- Check after every storm: Hail, hard wind, a big monsoon dump, go up and look afterward. That's when fresh damage shows up.
- Keep a paper trail: Log the membrane's age, the manufacturer, when it went on, every repair since. That history tells the next inspector a lot. And if the surface is breaking down across the board, a coating can buy you years for a fraction of a replacement. You can discover more about restorative flat roof coatings to see how they can extend the life of an aging membrane.
2. Flashing and Penetration Sealing
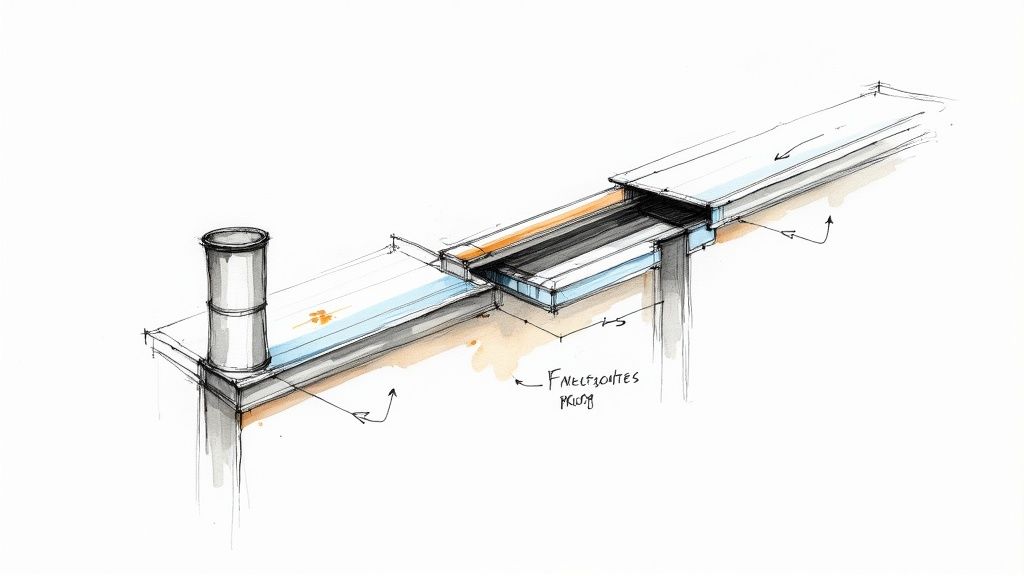
Flashing is where most commercial roofs spring a leak. It's the metal or membrane that seals up around anything poking through the roof, your HVAC units, vents, skylights, pipes. Every one of those is a hole somebody cut on purpose, and the flashing is the only thing keeping water from pouring straight in. So this checkpoint is all about whether those seals are still doing their job.
You're looking for gaps, cracks, rust, seams that have split open. You check the pitch pockets, where sealant dries out and shrinks away from the pipe over the years, and the counter-flashing that's come loose and stopped shedding water the way it should. These spots cause more nagging, comes-back-every-rain leaks than anything else on the roof, which is exactly why you can't skip them.
Why Flashing Assessment is Non-Negotiable
Ignoring your flashing is like leaving a window cracked open during the monsoon. The National Roofing Contractors Association puts it at 65 to 75 percent. That's how many commercial roof leaks trace back to bad flashing or a poorly sealed penetration. These spots get pulled and pushed every single day as the roof heats up and cools off, and that constant movement wears the seals out.
The good manufacturers, Carlisle and GAF among them, build flashing systems made to take that abuse. But even the best stuff needs eyes on it regularly. Catch a small sealant crack early and it's a quick reseal. Let it go and the water gets into your insulation, your structure, and pretty soon you've got mold. A careful look now is how you keep a five-dollar problem from becoming a five-figure one that shuts down part of your building.
Actionable Tips for Flashing Inspection
Work these into your routine and your penetrations stay tight.
- Reseal before it fails: Re-caulk the flashing every two to three years whether it looks bad or not. You're getting ahead of the dry-out, not waiting for the leak.
- Match your materials: When you repair, make sure the new sealant, polyurethane, silicone, or butyl, plays nice with what's already there. Mix the wrong ones and the bond won't hold.
- Watch the drainage: The area around each penetration needs to slope so water runs off. Let it pond around the flashing and it'll rot the seal in a hurry.
- Map your penetrations: Keep a roof plan that marks every pipe, vent, and unit. It makes the next inspection faster and keeps you from missing one.
- Don't cheap out on sealant: Use the commercial-grade stuff rated for roofs and UV. The bargain tube fails early and costs you more in the end. A lot of this applies to houses too, and you can see it in a comprehensive homebuyer roof inspection checklist for additional insights.
3. Drainage System Functionality
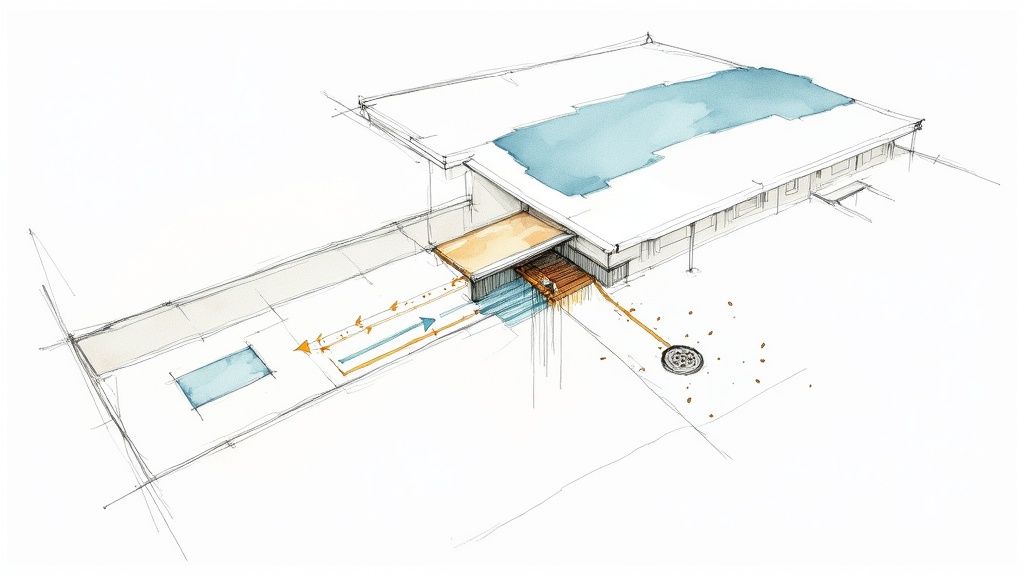
Drainage is how the roof gets rid of water, and on a flat commercial roof that's a bigger deal than people think. This part of the checklist makes sure everything that moves water, the drains, the scuppers, the gutters, the downspouts, is clear and flowing. Get it wrong and water just sits there. Standing water is heavy, it eats the membrane alive, and in a bad case it can buckle the structure underneath.
So you go through it looking for clogs. Leaves, dirt, blown-in trash, sometimes a bird's nest jammed in a drain. You check for gutters that have sagged out of line, busted downspouts, and drain baskets packed solid. It doesn't take much of a blockage to back water up, and once it's ponding, it's shortening your roof's life fast and voiding a lot of manufacturer warranties while it's at it.
Why Drainage Assessment is Non-Negotiable
Neglect the drainage and you're asking for water trouble. Ponding water leans hard on the structure, and it grows algae and weeds that chew right through the membrane. Even here we get cold snaps, and standing water that freezes overnight expands as ice and pries your seams apart.
The places that can't afford a leak, museums, data centers, treat drainage like it's sacred, because what's under that roof is irreplaceable. Big warehouses and distribution centers run drain cleanouts every quarter so they don't lose a pallet of product to water. A drainage system that works is just good, cheap insurance on everything below it.
Actionable Tips for Drainage Inspection
Keep the water moving with these.
- Clean it on a schedule: Have the drains, gutters, and scuppers cleaned two to four times a year, more if you've got big trees dropping leaves all over the roof.
- Put guards on: Drain guards, leaf screens, scupper boxes, they keep the chunky debris out of the lines. Small fix, big drop in how often you're up there unclogging things.
- Run a water test: On a dry day, pour some water around the drains and watch how fast it goes. That tells you the lines are clear and the roof actually slopes toward them.
- Mark the puddles: After a rain, measure and photograph anywhere water still sits 48 hours later. Those are your low spots, and tracking them shows whether they're getting worse.
- Check the slope: You want at least a quarter inch of fall per foot so water actually heads for the drains. If it keeps ponding in the same place, get a roofer up there to look at the slope itself.
4. Fastener and Attachment Integrity
Fasteners are the part nobody thinks about until they fail. They're what hold the whole system down, the membrane to the insulation, the insulation to the deck, the equipment to all of it. When they rust out, work loose, or pull free, that's how roofs blow off, especially when the wind kicks up during a storm.
So you check the attachment points for stress. You look for fastener back-out, where a screw slowly walks its way up out of the deck, and for rust that's eating away at the holding power. Those connections are the only reason the roof stays put when the wind tries to peel it back, so this is one you don't want to wave off.
Why Fastener Integrity is Non-Negotiable
Skipping the fasteners is like ignoring the foundation under a house. The whole assembly only works because those mechanical connections tie it together. Check them on a schedule and the roof holds up to wind and weather instead of letting one loose screw spread into a system-wide failure.
Coastal spots like Florida have strict fastening patterns written right into the hurricane codes. And the big manufacturers, Duro-Last and Firestone among them, spell out the exact fastener type and pattern, miss it and your warranty's void. FM Global found that a big chunk of membrane failures in wind events came straight back to compromised fasteners. That's why it's a real risk, not a nitpick.
Actionable Tips for Fastener Inspection
Do the fastener check right with these.
- Go by the spec: Stick to the manufacturer's fastener type, spacing, and depth. Wander off it and you can void the warranty and weaken the roof at the same time.
- Pull the rusty ones: Any fastener showing rust comes out and gets replaced, now. In harsh environments, start with stainless or coated fasteners so you're not fighting corrosion the whole time.
- Photograph the patterns: Shoot the fastener layout and condition in good detail. You'll need it to prove warranty compliance and to spot trouble building over time.
- Don't over-drive: Crank a fastener too tight and you'll punch through the membrane or crush the insulation board underneath, which just hands water a way in.
- Re-check tension: Where wind's a factor or the building flexes a lot, have the fasteners checked every two or three years. Find loose or failed ones and don't sit on it, you can get details on professional roof repair to address these vulnerabilities before they cause major damage.
5. Structural Deck and Substrate Condition
The deck is what everything else sits on. Concrete, steel, or wood, it's the support holding up the whole roof. Let it go bad and you get the worst kind of failure, the membrane separating, water ponding because the deck has dipped, and in a real bad case the thing actually coming down. That's why the deck earns its own spot on the checklist.
You look for the deck breaking down. Cracks. Rust on a steel deck. Spalling on concrete, where the surface flakes and crumbles. Rot in wood. You also watch for settling, layers pulling apart, or any sign the structure is moving, since all of that creates low spots and overstresses the membrane. Fix the surface and ignore the deck and you're just treating the symptom while the real problem keeps growing underneath.
Why Deck and Substrate Assessment is Critical
A healthy deck means the materials on top of it last. A failing one can't properly hold the membrane or the equipment bolted to it, so you end up paying for the same repairs again and again. The deck carries the roof, the HVAC units, and everything the weather throws down, which makes it a building-safety issue, not just a roofing one.
Older concrete decks, especially where it freezes and thaws, tend to spall, and once the surface crumbles your fasteners lose their grip. Metal decks that expand and contract day after day eventually develop stress cracks. Spot either one early and you head off a failure that would've taken down the whole system.
Actionable Tips for Deck and Substrate Inspection
Here's how the pros check a deck.
- Test for moisture: Run a calibrated moisture meter, especially over concrete and wood, to catch hidden water from a leak or condensation before it shows.
- Measure the movement: If the structure looks like it's shifting, take laser measurements as a baseline and compare them inspection to inspection so you know if it's getting worse.
- Photograph the defects: Good shots of every crack, rust patch, and spall. That's how you watch damage progress instead of guessing.
- Watch for new cracks: Pay attention to fresh cracks or old ones spreading between visits. That means the problem's picking up speed.
- Use NDT on big systems: On large or complicated decks, non-destructive testing like ultrasonic scanning finds hidden corrosion and delamination without tearing into the roof.
- Bring in an engineer: Find something serious structurally and you call a structural engineer. A roofer sees the symptom, but the engineer diagnoses the cause, and you want that nailed down before any major repair. You can learn how foundational issues impact overlying materials to understand the importance of a solid base.
6. Insulation Layer Assessment
Under the membrane sits the insulation, and it's doing more than you'd think. It controls your energy bill, helps hold the system up, and manages moisture. In Tucson, where the AC runs half the year, that energy piece is no small thing. So you check the insulation for water, for crushing, for shifting around, for anything that says it's wearing out.
What you're after is the spots where it's stopped working. Wet insulation loses its R-value, which means your cooling cost climbs and mold gets a foothold. Crushed or shifted insulation leaves low spots where water ponds and leans on the membrane. Catch this early and you keep the power bill in check and the whole roof from failing ahead of schedule.
Why Insulation Assessment is Non-Negotiable
Bad insulation drags your building down quietly, where you can't see it. It carries the weight of the rooftop equipment and the foot traffic while it's holding your interior temperature. Check it well and you stay on the right side of energy code and stop bleeding money out through the roof.
Buildings chasing LEED certification lean hard on solid insulation to earn their energy credits. And out here in hot Southern Arizona, plenty of industrial facilities run detailed insulation checks just to find the soft spots that are jacking up the cooling bill. Done right, the insulation goes from something you forget about to something actively saving you money.
Actionable Tips for Insulation Inspection
Do an insulation check that actually means something with these.
- Scan it with infrared: Run a thermal camera over the roof, best done after sunset. Wet insulation holds heat longer than dry, so it lights up as hot spots your eyes would never see.
- Feel for crushing: Walk the roof and watch for low spots, dips, or anything spongy underfoot. The walkways and the ground around heavy HVAC units are where the insulation gets crushed first.
- Check it against code: When you're doing a replacement or a big repair, measure the existing insulation's thickness and R-value against current energy code. That's your shot to upgrade and save for years.
- Look for settling: On older roofs the boards settle and curl. Uneven surfaces or membrane seams that look stretched are telling you something underneath is moving.
- Cut a core sample: If the thermal camera shows wet areas, pull a core to confirm how soaked it is and how far it spreads. That's your hard proof when it's time to plan the repair.
7. Roof Equipment and Curb Condition
The stuff sitting on your roof, HVAC units, exhaust fans, solar panels, causes a surprising number of problems. This part of the checklist covers both the equipment and the curbs it's mounted on. Those curbs are penetrations through the membrane, so if they're not sound you get leaks, strain on the structure, and safety issues all at once.
Checking them means looking for rust, damage, and whether the base is still sealed up tight. Heavy machinery weighs on the structure, and the constant vibration works flashings and seals loose over the years. A real check makes sure every unit is bolted down, flashed right, and not poking a hole in your waterproofing.
Why Equipment and Curb Assessment is Critical
Ignoring your rooftop equipment is a high-stakes bet. Every unit is a big penetration, and one failed curb seal can let in a lot of water. Check them right and you head off the leaks that ruin both the expensive machinery and whatever's underneath it. You also confirm the weight's spread out the way it should be so the deck isn't taking it all in one spot.
The places that can't go down, hospitals and data centers, run tight mounting standards and check often. Hospitals time their roof checks with facilities maintenance so the HVAC keeping the air clean isn't quietly wrecking the roof. Big shopping centers do quarterly walks just to keep up with the dozens of tenant units chewing on their membrane.
Actionable Tips for Equipment and Curb Inspection
Check your equipment and what it's doing to the roof with these.
- Replace curb seals early: Don't wait for the drip. Plan on swapping the seals around equipment curbs every three to five years, because they're cooking in UV and heat the whole time.
- Re-check mounting after wind: After a hard blow, go put hands on everything, antennas and satellite dishes included, and make sure it's still bolted down. A loose unit turns into a projectile and tears up the membrane.
- Look at the vibration dampers: On the big HVAC units, check the rubber grommets and isolation parts. When those wear out, the vibration goes straight into the roof and loosens connections and seals.
- Log the unit details: Write down serial numbers, manufacturer, and install dates for the major equipment. You'll want it for scheduling maintenance and chasing warranties.
- Watch the condensate lines: Make sure the HVAC condensation lines actually work and aren't just dumping water onto the roof, which eats the membrane. That water should run to a real drain, not a puddle.
8. Overall Roof System Age and Remaining Useful Life
Knowing how old your roof is and how many years it's got left changes how you plan. This one steps back from today's damage and asks the bigger question. It's what lets you budget ahead and decide whether to repair, recoat, or replace the whole thing. Done right, the roof stops being a surprise expense and becomes something you actually manage.
You take the install date, the material, and the current shape it's in, then measure it against what those systems normally do. A well-kept EPDM roof can run past twenty years. A TPO out here in the Southern Arizona sun is more like fifteen to twenty before it's spent. That number drives the smart money decisions that line up with where you're taking the property.
Why Age & Lifecycle Assessment is Non-Negotiable
Not knowing where your roof is in its life is like driving with no fuel gauge. You risk it dying all at once and forcing an emergency replacement at top dollar. Stay ahead of it and you can forecast the big spend, line up the money early, and schedule the replacement for a good time of year instead of scrambling.
The big real estate firms and the managers on platforms like CoStar and Yardi track roof age across their whole portfolios for a reason. It moves property values, it shows up in due diligence, and it shapes the long-range budget. A roof near the end of its life is a liability sitting on the books. A fresh one is money in the bank.
Actionable Tips for Lifecycle Assessment
Get a real read on your roof's age and plan for what's next with these.
- Keep good records: One file with the install date, who did it, the material specs, the warranties, and a log of every repair since. All in one place.
- Use the benchmarks: Stack your roof's age and condition against what your system type normally does, TPO, EPDM, PVC, in your climate. Ours is rough on roofs, so factor that in.
- Re-assess every couple years: Once a roof passes ten, get a thorough condition check every two to three years to update how much life it's got left. You can get professional insights by scheduling a comprehensive commercial roof inspection to get a clear picture of its health.
- Start planning early: Begin lining up a replacement two to three years before the roof's supposed to give out. That's enough runway to budget, pick a contractor, and schedule it right.
- Budget for upkeep: Set aside somewhere around 8 to 15 percent of what a full replacement costs every year for maintenance. That spend buys you real extra years.
- Make the case for new: When you're weighing a replacement, write down the energy savings newer materials and insulation will bring. That ROI is what gets the capital request approved.
8-Point Commercial Roof Inspection Comparison
| Item | 🔄 Implementation Complexity | ⚡ Resource Requirements | ⭐ Expected Outcomes | 📊 Ideal Use Cases | 💡 Key Advantages |
|---|---|---|---|---|---|
| Roof Membrane Condition Assessment | Moderate — trained inspector, close-up and occasional testing | Thermal camera, inspection tools, moderate labor/time | Early leak detection, extended membrane life, warranty evidence | Routine maintenance, post-storm checks, warranty validation | Prevents costly water damage; document with dated photos; use thermal imaging |
| Flashing and Penetration Sealing | Low–Moderate — mostly visual, targeted repairs | Basic tools, sealants, occasional metal flashing replacement | Eliminates common leak sources, high repair ROI | Roofs with many penetrations, HVAC-heavy installations | Inexpensive fixes, selectable re-sealing, easy to monitor |
| Drainage System Functionality | Moderate — inspection plus functional water tests | Labor for cleaning, leaf guards, occasional plumbing work | Reduces ponding, slows membrane deterioration, lowers structural stress | Rainy climates, tree-lined buildings, large flat roofs | Extends roof life by reducing standing water; install drain guards |
| Fastener and Attachment Integrity | High — labor-intensive, may require close inspection or re-fastening | Skilled crew, corrosion-resistant fasteners, safety equipment | Prevents membrane blow-off, maintains warranty and wind resistance | High-wind/coastal properties, older roof systems | Critical for storm resistance; targeted re-fastening can save replacement costs |
| Structural Deck and Substrate Condition | High — may require moisture testing, NDT, structural review | Moisture meters, NDT tools, possible structural engineer involvement | Detects systemic failures, informs repair vs. replacement decisions | Aging buildings, visible sagging/delamination, capital planning | Identifies collapse risks and major capital needs; informs lifecycle planning |
| Insulation Layer Assessment | Moderate–High — thermal imaging, possible core sampling | Thermal camera, moisture detection, potential membrane removal | Identifies wet/settled insulation, improves energy performance | Energy-efficiency projects, LEED buildings, HVAC-heavy facilities | Optimizes energy use; consider upgrade during membrane replacement |
| Roof Equipment and Curb Condition | Low–Moderate — visual and access coordination with operations | Basic tools, sealants, coordination with equipment teams | Reduces equipment-related leaks, ensures safe mounting | Hospitals, data centers, retail centers with rooftop equipment | Protects operations and interiors; replace curb seals every 3–5 years |
| Overall Roof System Age & Remaining Useful Life | Moderate — data collection, condition scoring, benchmarking | Records, inspection data, CMMS integration, occasional consultant input | Informs capital budgeting, replacement timing, warranty decisions | Portfolio management, long-term asset planning | Enables accurate budgeting and replacement planning; start planning 2–3 years prior |
Turning Your Inspection Checklist into a Long-Term Asset Protection Plan
A good commercial roof inspection checklist is more than a list you tick off. It's the start of an actual plan for managing the roof over the long haul. Work through these eight areas, membrane down to deck, and you stop reacting to disasters and start preventing them. Every problem you find, a scupper clogged during the monsoon, a flashing seam that cracked open in the sun, is a piece of information. Add it all up and that's how you protect the building, the business inside it, and your bottom line.
The real value shows up when you turn what you found into a report you can use. Photos, notes, measurements, all written down. That document is the thing you hand stakeholders to justify a maintenance budget, the proof a manufacturer wants before they honor a warranty, and the baseline you use to hold a contractor to his word.
From Checklist to Capital Plan: The Strategic Advantage
If you manage property or run a business in Southern Arizona, you've got to get this right. The UV out here is relentless and the temperature swings are brutal on roofing materials. A small thing you let slide doesn't stay small. It becomes water inside your building and a business that can't open its doors.
Your finished checklist should point straight to what you do next:
- Rank the repairs: Sort what you found by how urgent it is. An active leak gets fixed today. A little surface crazing can wait for the next maintenance window. Triaging it that way stretches your budget instead of blowing it.
- Build a maintenance calendar: Use what the inspection turned up to schedule the work ahead. Maybe that's cleaning the drains before and after monsoon season, or resealing the pipe penetrations every three years.
- Forecast the big spend: Pin down the roof's age and condition and you can call its remaining life pretty close. That lets you budget a replacement over a few years instead of getting hit with it all at once.
The takeaway: A roof inspection isn't pass-or-fail. It's a fact-finding trip that hands you what you need to make smart, cost-effective calls and squeeze more years out of the biggest thing protecting your building.
The Role of Professional Expertise in Asset Protection
This checklist gives you a solid framework, but reading the findings right usually takes someone who's been doing it a while. An experienced roofer can tell the difference between a cosmetic blemish and the first quiet sign the whole system's headed for failure. He can run the diagnostics, like an infrared moisture scan, that pull hidden trouble out of the insulation or substrate where you'd never spot it.
Teaming up with a local who actually knows the Tucson climate is the smartest move you can make for your roof. A good one doesn't just point at problems. He gives you the fix, the context, and a clear road forward. That's how your commercial roof inspection checklist stops being a piece of paper and turns into a real plan that protects the building from the top down.
Don't leave the integrity of your commercial property to chance. For a professional, photo-documented inspection that provides the clarity you need to protect your investment, contact the experts at Sunrise Roofers LLC. We provide Tucson-area business owners with detailed assessments and actionable recommendations to ensure their roofs are built to last.
Need roofing services in Tucson? Request a free inspection or call 520-753-1758. Related pages: Commercial Roofing · Roof Repair · Roof Replacement · Service Areas.
Published by Sunrise Roofers LLC
Licensed & Insured Roofing Contractor · Tucson, AZ