DIY Foam Roof Repair A Practical Guide
By Eddie Guillen · Updated Jun 10, 2026 · 15-23 min read
A good foam roof repair starts with your eyes, not your tools. Catch the damage early and you keep a small problem small. Wait until there's a stain spreading across your ceiling, and the foam underneath has already been soaking up water for a while. The skill is spotting the quiet stuff—a blister here, a hairline crack there—before any of that happens.
Stay ahead of those warning signs and you'll squeeze years more out of the roof. That's really the whole point.
Foam roof past a DIY fix? We handle Tucson flat-roof and coating repair — local, licensed (ROC #358079), free inspection. → Tucson Flat-Roof & Coating Repair
How to Spot Foam Roof Damage Early
You can't fix what you can't recognize. Most folks don't give their roof a second thought until a leak shows up over the couch—and by then the foam's already done some soaking. Get up there before that happens. A walk-through every now and then is the cheapest insurance you've got.
A healthy foam roof looks smooth and even. Then the Arizona sun goes to work on it, year after year, and those protective layers start to give. Learn to read the early warnings and you can save yourself a small fortune. What you find on that first look-around decides everything else you do.
The Tell-Tale Signs of a Worn Foam Roof
It's rarely a tree branch through the roof. The stuff that gets you is small and slow. Here's what to hunt for once you're up top:
- Blisters and Bubbles: Those raised bumps are air or moisture stuck between the foam and the coating over it. One little blister looks like nothing. It isn't. It's a soft spot waiting to pop and let water in.
- Cracks and Splits: Every roof breathes—it expands in the heat, pulls back in the cool. Do that enough times and the surface starts to crack. Leave those cracks be and they spread, the waterproof skin opens up, and moisture walks right into the foam.
- "Alligatoring" Texture: This one's pure UV damage, and it's the easiest to spot. The coating dries into a scaly, cracked pattern that looks exactly like alligator hide. The protective layer has gone brittle and lost all its give, and the foam underneath is now hanging out in the sun.
Expert Insight: Alligatoring is the sign most people walk right past, and it's one of the worst to ignore. See it, and the roof needs a fresh coat now—leak or no leak. Put it off and you're just running up the bill on a bigger repair later.
Conducting a Safe and Effective Walk-Through
A real inspection means getting on the roof. Squinting up from the driveway doesn't count. But don't be dumb about it—steady ladder, shoes with grip, every time.
Work the whole surface in some kind of order so you don't miss a patch. I start by walking the edges, then I slow down anywhere something pokes through the roof: seams, flashings, vents, HVAC curbs. That's where leaks almost always start. Keep an eye out for low spots where water sits after a rain, too. Standing water chews through a coating faster than the sun does.
You don't need a truck full of gear. A flashlight to see into the shade, and a utility knife to gently press on a blister and check for moisture underneath. If you want something to follow, you can borrow a general framework like this Tucson homebuyer roof inspection guide and aim it at the weak points of a foam system. Keeps you honest so nothing slips by.
Knowing When to Call a Professional
The trick is telling a patch job from a real problem. A couple of small cracks, a blister or two—that's usually a DIY kit and an afternoon. Those are isolated spots. The whole roof isn't falling apart.
Alligatoring all over the place, a bunch of big blisters, or spots that feel soft and spongy when you step on them? Different animal. That's waterlogged foam, and it means the trouble runs deeper than the surface.
Once more than 10-15% of the roof looks like that, call somebody. I've seen plenty of folks take a swing at a big repair without the right gear and end up with a worse seal and more leaks than they started with. Sometimes the cheapest move is knowing when to hand it off.
Essential Tools and Materials for Foam Roof Repair
Tackling a foam roof repair with the wrong gear is like duct-taping a leaky pipe. It'll hold for a minute. It won't hold. Whether your patch lasts a season or a decade often comes down to what you brought up the ladder with you.
And the right gear isn't just about speed. It's about not hurting yourself, and about a repair that can actually take a monsoon downpour and a 110-degree afternoon. Let's get your list together.
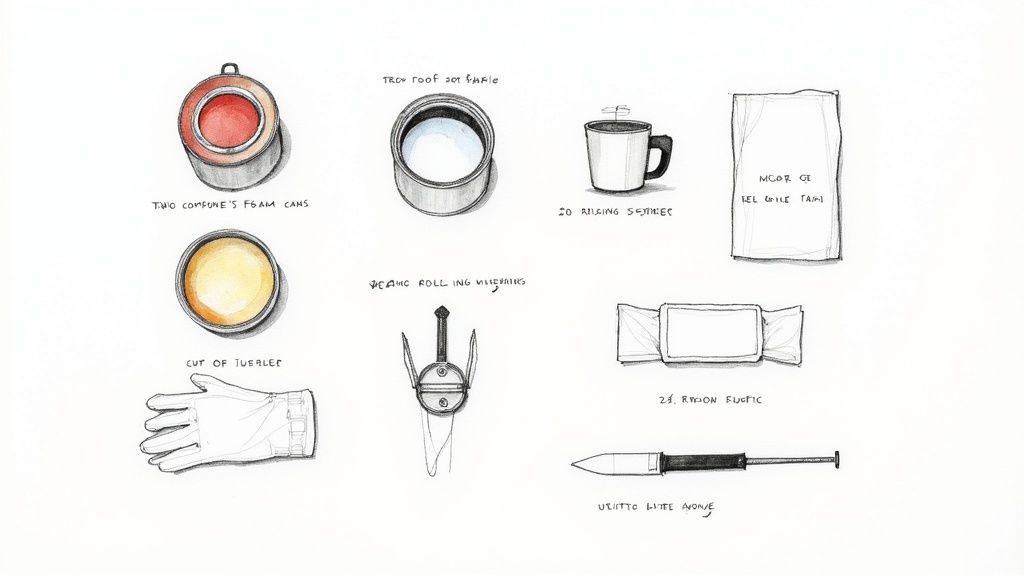
Core Repair and Coating Supplies
Two things sit at the center of the job: the foam, and the coating that keeps the sun off it. Neither one is one-size-fits-all, and what you pick here decides how long the fix holds.
You'll want a two-component spray polyurethane foam (SPF) repair kit. Two pressurized canisters come in the box—an "A" side (isocyanate) and a "B" side (polyol resin). They meet in the applicator gun, react, expand to fill the damage, and harden into a tough waterproof patch.
Once that foam cures, it needs a top coat to survive. Two ways to go here:
- Elastomeric Coatings: Acrylic, water-based, and great at bouncing UV off the roof. Easy on the wallet, too. The catch is ponding—anywhere water likes to sit, elastomeric breaks down quicker.
- Silicone Coatings: Silicone is the heavy hitter. 100% waterproof, moisture-cured, and it shrugs off standing water like nothing else. Costs more up front, sure. But on a flat roof where water ponds every monsoon, nothing else comes close. Want to see how we do it? Here's our guide to laying down a flat roof coating in Tucson.
For wider cracks or the weak spots around pipes and vents, grab reinforcing fabric. It's a polyester mesh you bed into the first coat. It adds backbone and keeps the crack from coming back.
Essential Surface Preparation Tools
Ask any roofer who's been at it a while and they'll tell you a foam repair is 90% prep. Foam and coating won't grab a surface that's dirty, dusty, or damp. Period. This step isn't where you cut corners.
A stiff wire brush earns its keep here, scrubbing off loose granules, flaking coating, and ground-in dirt. Got a bigger area or the whole roof to clean? A pressure washer on low-to-medium does the heavy lifting.
You'll want a sharp utility knife, plus a handful of spare blades in your pocket. That's what cuts out the waterlogged or damaged foam. Aim for clean, vertical edges around the bad spot so the new foam has something solid to grab.
Pro Tip: Don't spray a thing until that spot is spotless. Hit it with a leaf blower or shop vac and clear out every last bit of dust. A film of dust you can barely see is enough to break the bond and send your patch packing early.
Foam Roof Repair Materials Checklist
Lay everything out before you start and the whole job goes smoother. Here's the short list of what you need and what to look for.
| Material | Primary Use | Key Selection Tip |
|---|---|---|
| Two-Component SPF Kit | Filling cracks and damaged areas. | Match the kit size to your repair area; small kits are great for patches, larger for bigger jobs. |
| Silicone or Elastomeric Coating | Protecting new foam from UV rays and water. | Choose silicone for areas with ponding water; elastomeric for general UV protection. |
| Reinforcing Fabric | Adding strength over large cracks and joints. | Look for a flexible polyester mesh that embeds easily into your base coat. |
| Roofing Primer | Promoting adhesion between the old surface and new repair. | Select a primer specifically designed for SPF and your chosen top coat. |
| Roofing Sealant/Caulk | Sealing small gaps around vents and flashing. | Use a polyurethane-based sealant for flexibility and long-term durability. |
That covers the core of a durable repair—one that blends right into the roof you've already got.
Safety Gear You Cannot Skip
Let me be straight with you—SPF chemicals are nothing to mess around with. The isocyanates in that "A" side canister can wreck your lungs and tear up your skin. Gearing up isn't optional. It's the price of admission.
Have this on before you crack a canister:
- Respirator: A real one that fits your face, to keep the vapors out of your lungs.
- Safety Goggles: Foam and coating splash. Chemical burns to the eye are no joke.
- Nitrile Gloves: Bare skin and this stuff don't mix—it'll rash you or soak right in.
- Long Sleeves: Cover your arms so a stray spray of uncured foam doesn't find them.
Line up the tools, the materials, and the safety gear before you head up, and you've already done half the work of a repair that'll keep doing its job for years.
Mastering Surface Preparation for a Lasting Fix
A good foam roof repair isn't won with fancy foam or a slick final coat. What separates a patch that dies in a season from one that lasts ten years is the prep. The boring part. The part nobody photographs, that happens before any new material touches the roof.
Rushing it is the number one mistake I see. Every speck of dirt, every drop of trapped moisture, every flake of loose coating you leave behind turns into a spot where the new repair lets go. So let's prep this surface the way we'd prep it on a paying job.
Cleaning the Damaged Area Thoroughly
Start with a clean slate, and I mean clean. Foam and coating are picky—they need a surface with nothing on it to grab onto. A thin film of dust sits between the new material and the roof like a sheet of wax paper, and the bond never happens.
Take that stiff wire brush and scrub the damaged spot hard, plus a few inches all around it. Loose coating, ground-in dirt, crumbly old foam—work it all free. Then chase it out with a shop vac or leaf blower. Don't just sweep the debris around. Get it gone.
Bigger area, or a roof that's really filthy? A pressure washer on medium does well. Just don't crank it so high you carve grooves into the good foam.
The Critical Step of Removing Waterlogged Foam
Step somewhere that feels soft or spongy and you've found waterlogged foam. It's dead weight—useless to build on, and it all has to come out. Lay new foam over a wet, mushy base and the patch is going to fail. No way around it.
Grab the sharp utility knife and start cutting out the soaked foam. You're carving a clean "bowl" here: straight vertical walls, a solid flat floor.
- Avoid Angled Cuts: Slope the edges and you leave a thin, weak lip the new foam can't hold onto. Cut 90 degrees instead, straight down, so the foam has the most surface to bond to.
- Cut Until It's Dry: Keep going until your blade hits firm, dry, healthy foam. Don't talk yourself into leaving a spot that's only a little damp. Moisture is the killer of a good foam roof repair, every time.
A Note on Moisture: SPF foam is a chemical reaction, plain and simple. Get water in the mix and you throw that reaction off—poor bond, bad cure, a weak patch that peels or blisters before you know it. The surface has to be bone dry before you go any further.
Ensuring a Completely Dry Surface
Cleaning and cutting done, your last job before new material is making dead sure the area's dry. If you pressure-washed, give every drop time to evaporate. On a hot Tucson afternoon that might be a couple hours. On a cooler, muggier day it's a lot longer—so wait.
Here's a trick: the tape test. Press a strip of clear packing tape firmly onto the prepped spot, then peel it back. See any fog or moisture on the sticky side? The roof's not ready. Give it another hour and check again. Thirty seconds of tape can save you from a patch that fails in a month.
Slow down on the prep and a simple patch becomes a real, durable part of the roof. You can see what careful prep and recoating does in this walkthrough of a Tucson flat roof coating transformation—a clean surface is what makes the finish look right. The global roofing materials market sat at roughly USD 143.86 billion in 2025, and that's people paying for durable stuff like foam, which only performs if it goes down correctly.
Applying Foam and Coating for a Seamless Seal
Roof's cleaned, cut, and dry—now the fun part. All that prep pays off here, giving the new material a clean surface to lock onto and form a permanent, watertight bond with the old roof. Spraying foam isn't slapping on a patch. You're running a chemical reaction in real time, and you're the one steering it.
From mixing the two parts right to laying the last top coat, every step wants a steady hand. Foam that isn't level, fabric that isn't pressed in, coating that's too thin—any one of those and you lose the smooth, leak-proof seal you came up here for.
This quick rundown lays out the prep that has to happen before any new material touches the roof.
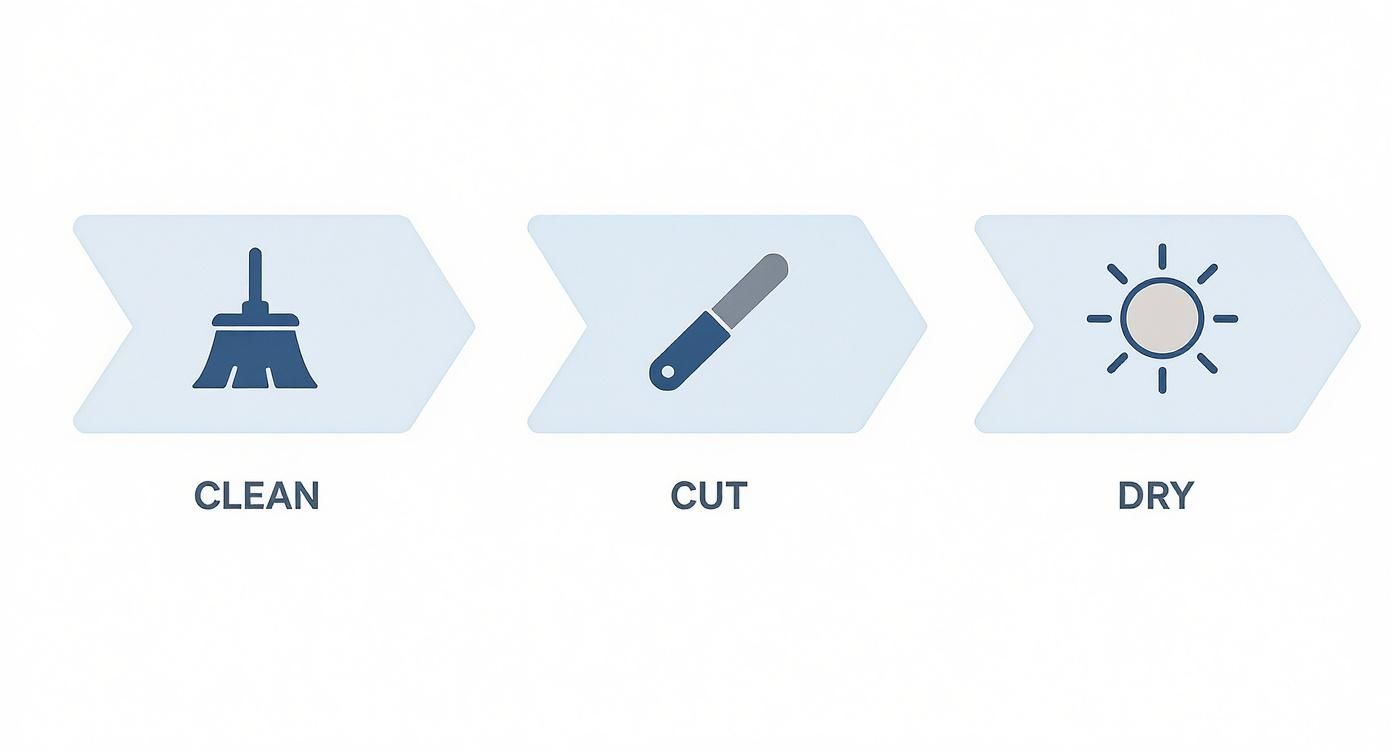
It's the same order every time: clean, cut, dry. Hit those three and you're cleared to start applying.
Mixing and Applying the SPF Repair Foam
The two-component SPF kit is what makes a real foam roof repair a foam repair. Inside: that "A" side (isocyanate) and "B" side (polyol resin). They meet, they expand, they harden into a rigid foam that crawls into every crack and crevice. Two things make or break the patch—temperature and the mix.
Most DIY kits like it between 65°F and 85°F. Too cold and the foam won't rise right; you end up with a dense, weak patch that barely insulates. Too hot and it expands in a hurry, going brittle on you. Read the can and stick to the numbers the maker gives you.
The mix matters just as much. On canister kits the applicator gun handles the ratio, but you've got a part to play: shake both canisters hard before you start. That gets the chemicals stirred up so they blend right at the nozzle.
Pro Tip: Before you aim it at the roof, fire a test shot onto a scrap of cardboard. Good foam comes out in a steady stream and puffs up creamy and off-white. Looks dark, runny, or splotchy? Stop right there. The mix is off and it won't cure.
Time to fill the spot—short, controlled bursts, not one big blast. Build it up in thin layers, about 1 inch a pass, instead of dumping it all into the cavity at once. Each layer gets to cure, and you keep way better control over the final height. Overfill it a touch on purpose. Once it's hard (usually about an hour), run a serrated blade across it and shave it flush with the rest of the roof.
Embedding Reinforcement Fabric for Durability
Foam's cured and shaved level—now you give it some backbone. That comes from a base coat and reinforcement fabric working together, and it really earns its keep on bigger repairs or the high-stress areas around vents and seams.
Brush on a generous base coat of your sealant, silicone or elastomeric, over the whole patch. Carry it 4 to 6 inches out onto the roof around it. While it's still wet, lay your polyester fabric right down into it.
Take a brush or roller and press the fabric into the wet coating, gently. You want to watch the sealant bleed up through the mesh. Work out every wrinkle and bubble as you go. It's the same idea as rebar in concrete—you end up with a tough, flexible membrane that keeps cracks from coming back.
Applying the Final Top Coats
Once the base coat and fabric go tacky to the touch, you're on to the top coats. This is your waterproof barrier, and it's also the sunscreen for the foam hiding underneath.
- First Top Coat: Lay a full-strength coat over the whole repair, and bury that fabric completely. Work from the middle out, feathering the edges so it blends into the roof instead of leaving a ridge.
- Second Top Coat: When the first one's dry—check the can for recoat time—put down the second. That's what closes up any pinholes and gets you the dry film thickness (DFT) you need to actually stay waterproof. For most silicone, you're shooting for 20 to 30 mils to make it last.
SPF catching on isn't a fluke. The global spray polyurethane foam market is headed for USD 4.2 billion by 2035, with the U.S. alone projected at USD 1.3 billion. People keep buying it for the insulation and the seamless, durable finish you just can't fake.
On a tricky job or widespread damage, the little things decide everything. If a bigger project has you second-guessing, there's no shame in calling in folks who do expert roof repair in Tucson for a living. A solid seal is what stands between your roof and the weather.
Your Post-Repair Inspection and Maintenance Plan
Dry coating doesn't mean the foam roof repair is done. Whether the fix actually holds comes down to two things you do after: a real final inspection, and a maintenance habit you stick to. That's what turns a decent patch into something watertight that protects the place for years.
Treat it like the final quality check. Give everything a full 24 to 48 hours to cure—longer in cooler or wetter weather—then climb back up for a close look. Don't just glance at the patch. Get your nose right down on it and hunt for the little flaws that turn into big ones six months out.
The Final Post-Repair Checklist
Walk the roof and put your eyes right on the repair. What you're confirming is simple: the patch is now part of the roof, not a thing sitting on top of it.
Here's what you're checking:
- Seamless Transitions: Run a hand over the edges where new coating meets old. It should feel smooth—no hard ridge, no dip. A feathered edge lets water run right over the repair instead of damming up against a lip.
- Complete and Uniform Coverage: Look the top coat over for anywhere it's thin or nearly see-through. Color and texture should match across the whole patch. Any uneven spot is a weak spot, and the UV will find it first.
- No Pinholes or Blisters: Tiny pinholes or fresh blisters are bad news. They mean air or moisture got trapped underneath and your seal's already compromised. Hit them right away with a dab of sealant.
Expert Takeaway: Never skip the final walk-through. Dabbing a pinhole the day you finish is nothing. Chasing a mystery leak across the whole roof next winter is a Saturday gone. Five minutes now protects everything you just spent.
Building a Simple Maintenance Schedule
A foam roof is low-maintenance. It is not no-maintenance. A little attention twice a year is what gets one to 20 years or more, and staying ahead of trouble beats reacting to it every time.
We like late spring—after the winter junk piles up, before the heat sets in—and again late fall, once monsoon season's done and before the cold. Your main job up there is clearing off leaves, branches, and anything else that traps moisture or plugs a drain. While you're at it, give the whole roof a once-over, and linger on the spot you just fixed.
Regular check-ups are getting more attention across construction, too. Everybody wants energy-efficient buildings now, which is pushing the foam insulation market up, especially with federal money on the table for retrofits. All of that just says the same thing we tell customers: keep these systems up and they'll pay you back in lifespan and energy savings. Dig into the full research on the foam insulation market if you want the numbers.
Catch a small crack or a new blister early and a major foam roof repair shrinks down to a ten-minute fix. Not sure what you're even looking at? Our guide to professional roof inspection services walks you through it. Stay on top of it and the roof keeps doing the one thing you need it to—keeping the weather out of your building.
DIY Kit vs. Professional Foam Roof Repair: Cost Comparison
People ask us this one all the time: grab a foam roof repair kit and do it myself, or call somebody? Here's an honest look at both, side by side, so you decide on the size of the problem instead of just the sticker price.
| Approach | Typical cost | Best for | Watch-outs |
|---|---|---|---|
| DIY repair kit | $50–$300 (SPF kit + coating) | One or two isolated blisters or small cracks on an otherwise healthy roof | Hard to get a lasting seal; no warranty; walking the roof can crack good foam; won't fix trapped moisture |
| Professional repair / recoat | ~$300–$1,500 spot repair; ~$2.50–$4.50/sq ft full recoat | Widespread alligatoring, multiple blisters, ponding, soft spots, or any active leak | Higher upfront cost — but includes proper prep, a roof-wide fix, and a workmanship warranty |
Rule of thumb: once more than 10–15% of the roof's damaged, or you're stepping on soft, spongy spots, a DIY kit is just a band-aid. A professional recoat ends up cheaper over the long haul. In Tucson, Sunrise Roofers handles foam roof repair and recoating, and the inspection's free.
Common Questions on Foam Roof Repair
Even with a guide in hand, a foam roof repair can feel like a lot. You're handling specialized stuff—two-part foam, silicone coatings—so of course you've got questions. Straight answers are what keep you from messing it up.
Homeowners ask us the same handful of things over and over. Let's knock them out, from how long a patch really holds to how Arizona weather decides when you can even start.
How Long Does a Foam Roof Repair Last?
The big one. And it really comes down to prep. Do the repair right on a clean, dry surface and it's not a temporary anything—it bonds chemically and becomes a permanent part of the roof you already have.
A pro-installed spray foam roof goes 20 to 30 years without much trouble, and a repair done right rides along with it. The catch is recoating the whole roof every 10–15 years to top off the UV protection. Prep and coat a small patch correctly and it'll hold right beside the rest of the roof until that next recoat comes due.
Silicone vs. Elastomeric Coatings: What's Better?
The top coat is what shields the foam from sun and water, and both kinds have their place. Let your roof's actual problems pick for you.
- Elastomeric (Acrylic) Coatings: A solid, budget-friendly pick for reflecting UV and keeping the roof cooler. Its weak spot is ponding water. If your roof holds water in low spots after a storm, elastomeric can soften and peel on you over time.
- Silicone Coatings: On a flat roof in a place with a real monsoon, silicone wins easy. It's 100% waterproof and standing water doesn't faze it one bit. Costs more up front, but for a permanent, leak-proof fix where water ponds, nothing else holds up like it.
In Tucson, silicone is the smart money on almost any flat or low-slope foam repair. The way it handles standing water gives you a margin acrylic just can't match.
Can I Do a Foam Roof Repair in Any Weather?
Nope. Weather is the single biggest thing standing between you and a good repair. The reaction that makes spray foam is touchy about both temperature and moisture, and patching in the wrong conditions sets you up to fail before you even start.
Most DIY kits want the air between 65°F and 85°F to expand and cure right. Too cold and the foam won't rise, so you get a dense, weak patch. Too hot and it expands too fast and turns brittle.
Above all, the surface has to be bone dry. A little morning dew is enough to kill the bond and keep the foam from grabbing. Pick a clear, dry day with mild temps and you've already won half the battle.
Even a confident DIYer climbs down sometimes having found more than they signed up for. If the damage is widespread, or you'd just rather have it done by someone who does this every day, Sunrise Roofers LLC is right here. Twenty-plus years on Tucson roofs, sealing up flat and low-slope roofs so they quit leaking for good. No commission reps, no closers—you call, you get Eddie. Schedule your free, no-pressure estimate today!
Need roofing services in Tucson? Request a free inspection or call 520-753-1758. Related pages: Roof Repair · Roof Replacement · Service Areas.
Published by Sunrise Roofers LLC
Licensed & Insured Roofing Contractor · Tucson, AZ