repairing concrete tile roof: quick DIY fixes
By Sunrise Roofers LLC · Oct 28, 2025 · 12-20 min read
Fixing a concrete tile roof doesn't start with a ladder. It starts with a good hard look from the ground. Catch the little stuff early—a hairline crack, a chipped corner, a tile that's slid a hair out of line—and you save yourself a world of grief and a much bigger bill later on.
How to Know If Your Concrete Roof Needs Repair
Before you go anywhere near the roof, you can learn plenty just walking the yard. Concrete tiles are tough—there's a reason they're everywhere. They run about 47% of the global market share for roofing tiles, mostly because a well-kept concrete roof goes 40 to 60 years.
Even the toughest stuff loses to the weather eventually, though. So your first job is to play detective and hunt down the signs that say a repair's coming.
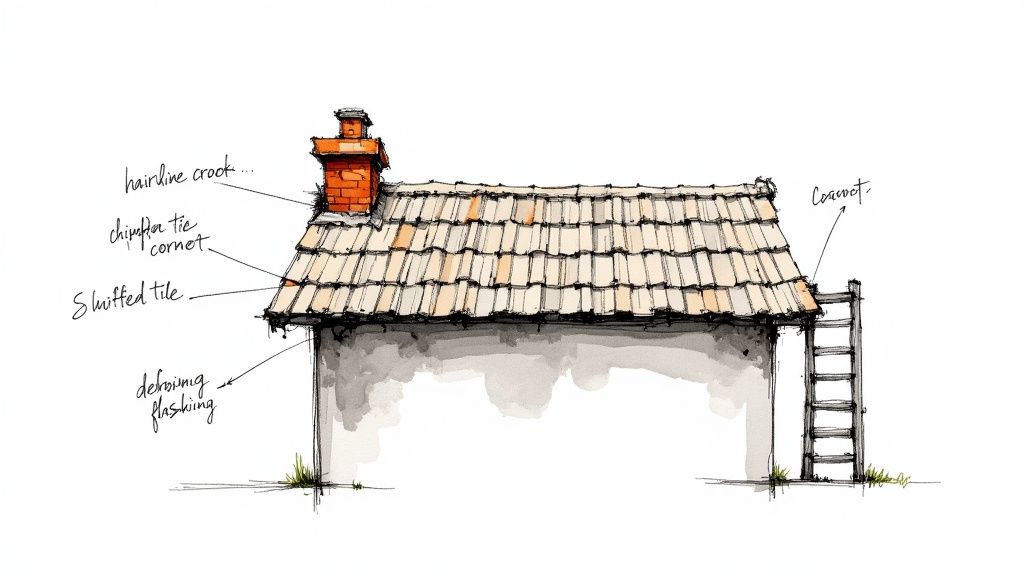
What to Look For from the Ground
Grab some binoculars and walk a loop around the house. It's the safest way to get a close look without setting foot on a ladder. You're hunting for a handful of red flags that say trouble.
Here's your checklist:
- Cracked or Broken Tiles: The obvious one. Clear splits, missing chunks, even those faint spiderweb cracks. Every one of them is a doorway for water.
- Chipped Edges and Corners: A chip looks cosmetic, but it weakens how the tiles lock together. That's all wind-driven rain needs to slip underneath.
- Slipped or Misaligned Tiles: Every tile ought to sit neat in its spot. One that's slid down or gone crooked means the roof's shell is broken—usually a fastener that gave out.
- Debris in Gutters: Find little bits of concrete grit in the gutters? The tile surfaces are starting to erode.
Staying ahead of it is everything with a roof. Regular checks let you catch small problems before they snowball, the same way a solid homebuyer roof inspection checklist walks you through it.
Inspecting Critical Roof Components
Once you've scanned the main field of tiles, look at the weak spots—wherever two parts of the roof come together. That's where most leaks get their start.
Give the flashing a hard look. Those are the metal strips around chimneys, vents, and skylights. Rusted? Bent? Is the sealant cracked or peeling away from the edge?
Bad flashing is behind a huge share of leaks even when every tile is dead perfect. Spotting these trouble spots from the ground tells you the real size of your repairing concrete tile roof job—whether it's a quick tile swap or something gnarly enough to hand off to a pro.
Gearing Up for a Safe and Successful Repair
A good tile repair lives or dies on prep. Diving into this work without the right gear isn't just a bad idea—it's dangerous. Before you touch a ladder, round up your tools and safety equipment. We're not talking about grabbing a hammer. We mean the specific stuff that keeps you safe and keeps you from wrecking more of the roof.
Your own safety comes first, full stop. Height deserves respect, and the right gear isn't optional. You want non-slip, soft-soled boots so you grip the roof without scuffing or cracking tiles. A solid extension ladder, set at the right angle, is the only safe way up and down.
And you need a personal fall arrest system. That part's not a maybe.
- A well-fitted safety harness
- A strong rope and rope grab
- A secure roof anchor bolted into an actual roof truss
A fall off a single-story roof can still wreck you for life. Nothing replaces this gear.
The Right Tools for the Job
With safety sorted, it's on to tools. The wrong one turns a single cracked tile into a much bigger, pricier mess fast. A flat pry bar or a proper tile ripper slides under a tile and lifts the fasteners without leaning on the brittle tiles next to it. A regular crowbar? Too clunky—it'll crack something you didn't mean to.
You'll also want a hammer, a trowel for the adhesive, and a caulk gun. For the adhesive, get a high-grade polyurethane roofing sealant. That stuff bonds waterproof and shrugs off both the heat swings and the heavy rain.
Don't shrug off how hard it is to find the right replacement tile. Color's the easy part. The profile, the size, and the way it interlocks all have to match exactly, or it won't seal.
Sourcing Your Replacement Tiles
Matching an older tile can feel like detective work. Start by flipping a broken piece over—sometimes there's a maker's name or a model number stamped on the back. Skip the big-box hardware store; they almost never carry the specific profiles you need for a repair.
A specialty roofing supply house is your best shot. The folks there can often ID a tile from a few clear photos of the top, back, and side. And when the job gets bigger, or you just want help running down materials, an experienced team of roofing contractors in Tucson can save you a lot of guessing and get it right the first time.
A Practical Guide to Replacing Damaged Roof Tiles
Okay, inspection's done—time to get your hands dirty. Replacing a concrete tile isn't about muscle. It's finesse. A single cracked tile, especially one stuck in the middle of a big field, can look intimidating. Break it into steps, though, and it's simpler than you'd think.
First move? Open up a clean spot to work around the broken tile without setting off a chain reaction. The last thing you want is to turn a one-tile job into a three-tile headache.
This infographic lays out the simple three-part flow, from prep to the finished repair.
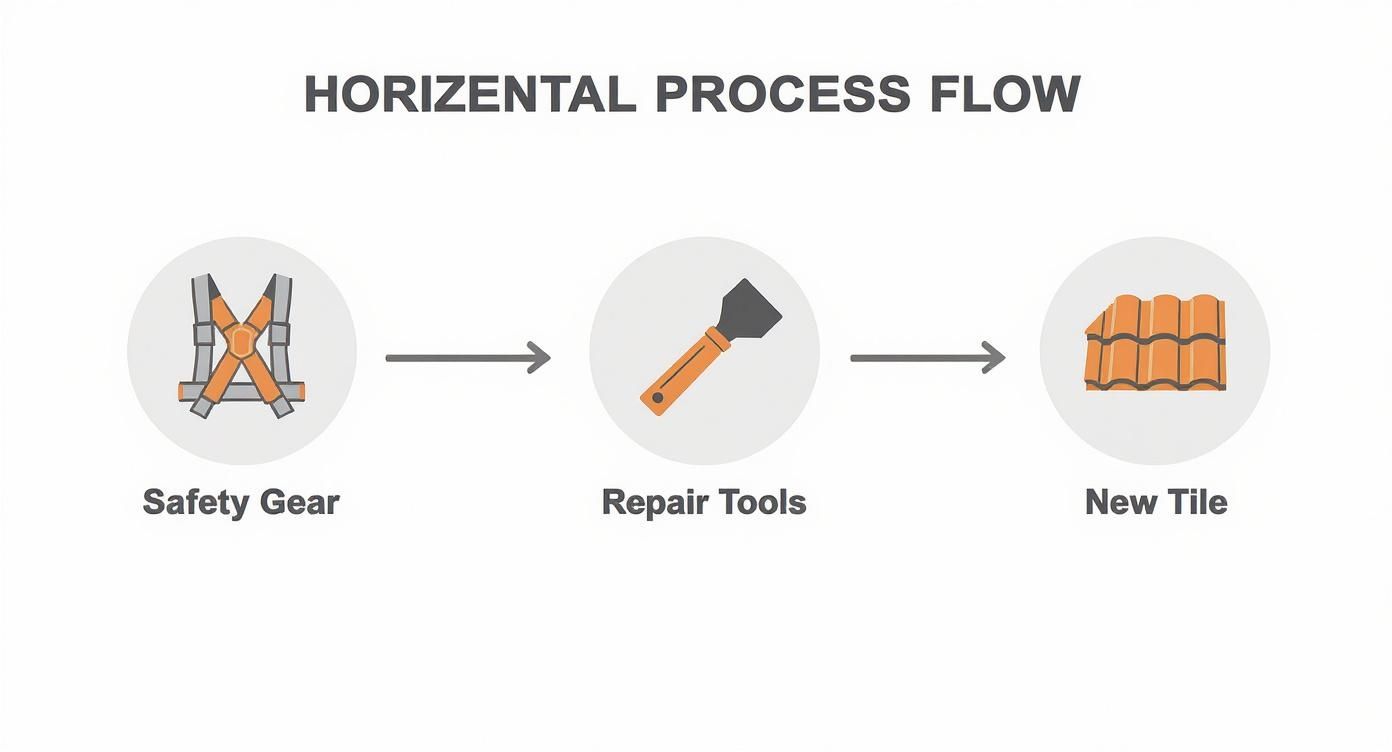
Like the guide shows, a good repair comes down to three things being ready before you start: your safety gear, the right tools, and a new tile that actually matches.
Gaining Access and Removing the Broken Tile
The trick is lifting the surrounding tiles just enough to work, without snapping any of them. Slide two wooden wedges under the bottom edge of the tiles sitting right above the one you're pulling.
Work them in slow until the upper tiles rise about an inch. That's it. Just enough to take the pressure off and expose the top of the bad tile and its fastener.
Now the weight's off, start pulling the broken pieces. Get the big fragments first, lifting them out clean. If the tile was nailed, use a flat pry bar to coax the nail loose. Slow down here. Yank on it and you'll tear the batten or the underlayment underneath.
Key Takeaway: This is careful removal, not demolition. Take each piece out gently so you don't crack the tiles next door or tear the underlayment. Patience is the best tool you've got right now.
With every piece out, grab a small brush or a rag and clear the dust and grit off the exposed spot. Skip this and the new tile rocks; do it and the new tile sits flat and solid.
Inspecting the Underlayment and Setting the New Tile
With the tile out of the way, you get a rare clear look at the roofing underlayment. That felt or synthetic membrane is your roof's last line of defense against water, so really look it over.
Hunt for tears, holes, or signs of moisture. A small puncture patches easy—a dab of roofing cement and a scrap of spare underlayment. But damage all over the place is a warning sign of something much bigger going on.
To keep you on track, here's a quick rundown of the core steps and what actually matters at each one.
Tile Replacement Task and Key Considerations
| Repair Step | Primary Objective | Key Tip |
|---|---|---|
| Gaining Access | Lift surrounding tiles without causing new damage. | Use wooden wedges to lift the upper course about 1 inch. |
| Removing Tile | Extract all broken pieces and fasteners carefully. | Go slow with the pry bar; avoid yanking to protect the batten. |
| Cleaning Area | Prepare a clean, flat surface for the new tile. | Brush away all dust and debris for a perfect fit. |
| Underlayment Check | Inspect for tears, holes, or moisture damage. | This is your roof's real waterproofing layer—don't skip this. |
| Applying Adhesive | Create a strong, weatherproof bond. | An S-shaped bead of polyurethane adhesive is the standard. |
| Setting New Tile | Position and interlock the tile correctly. | The new tile should sit flush and not rock or wobble. |
| Finalizing | Lower the upper course back into place. | Slowly remove the wedges to lock the new tile in. |
Follow these and you're not just plugging a hole—you're actually putting the roof back to right.
If the underlayment checks out, you're set to drop in the new tile. Run a fat S-shaped bead of polyurethane roofing adhesive across the underside of the replacement. That bead is what locks the tile down weatherproof and keeps the wind from getting under it and prying it loose.
Now ease the new tile into place. Make sure its bottom edge interlocks with the course of tiles below. It should feel snug and sit dead flush. Press down gentle so the adhesive grabs.
Last thing: slow and careful, pull the wooden wedges out from the upper course. The tiles settle back down and lock the top of your new tile in. Done right, you can barely tell where the repair is.
Swapping one tile is usually a fine DIY job. But if you turn up bigger problems, or you just don't feel right about it, back off. Knowing what goes into a professional concrete tile roof replacement helps you figure out your next move.
Navigating Common Repair Problems and Setbacks
Even the simplest tile repair can hand you a surprise. Honestly, you never really know what's going on up there until you start lifting tiles. Hitting a snag doesn't have to sink the whole project, though—it just means being ready for whatever turns up.
A good repair on a concrete tile roof usually comes down to staying calm and thinking it through. A new tile that won't sit flat, some ugly surprise hiding underneath—there's almost always a sensible fix. Handling those moments well is what turns a rough afternoon into a repair that actually holds.
Addressing Hidden Underlayment Damage
So you pull the broken tile and there it is—a fresh tear in the black underlayment. This is your roof's last barrier against water, so any breach matters. Whatever you do, don't just slap the new tile over it and call it good.
For a small puncture or tear, under six inches or so, a simple patch usually does it.
- Clean the Area: Wipe the underlayment down around the tear. Every bit of dust and grit has to go.
- Apply Sealant: With a putty knife, spread a thin, even layer of roofing cement around the whole hole.
- Place the Patch: Cut a piece of new underlayment that laps the tear by at least two inches all around. Press it down firm into the cement.
- Seal the Edges: Go back over every edge of the patch with another thin coat of roofing cement. You're after a seal water can't beat.
But if you're looking at damage all over—long rips, material so brittle it crumbles when you touch it, holes in a few spots—that's your signal to stop. Underlayment failing that bad means something larger is wrong, and no patch fixes it. That one's for a pro.
Troubleshooting a Poorly Seated Tile
What about when the new tile just won't lie flush? Maybe it rocks, or it sits higher than its neighbors. Real common headache, and it's almost always one of two things.
Check for debris first. A little pebble, a stray nail head, a clump of old mortar on the batten—any of those throws it off. Lift the tile back out and run your hand across the spot until it's clean and smooth.
If that spot's clear, look at the batten itself. A batten that's warped or split won't let the tile sit right no matter what you do. Fixing one is a bigger job, and that's usually the line where a DIY repair turns into a call to a pro.
The home renovation boom keeps pushing the roofing materials market, which hit USD 129.62 billion in 2023. That number says a lot about how much solid maintenance and proper repairs matter for protecting what a building's worth. You can dig into more numbers on the roofing materials market over at GrandviewResearch.com.
When to Call a Professional Roofer
Knowing where your limits are is the most important skill in any DIY job, and roofing doubly so. A few red flags tell you the problem is way past a simple tile swap. Reading up on why fixing broken roof tiles promptly is so important helps you spot when it's time to grab the phone.
Call a pro if you find:
- Widespread underlayment damage too big for a patch.
- Rot or soft spots in the wood decking underneath.
- Tiles set in old mortar beds—those take special tools and a careful touch to pull without cracking the ones next to them.
- A cluster of slipped or broken tiles in one area, which almost always means a bigger failure under there.
Any of these point to a problem swapping one tile won't touch. A pro can chase down the actual cause and make sure the whole roof is sound again.
Keeping Your Concrete Tile Roof in Prime Condition
Repair's behind you, and now the job shifts from fixing problems to heading them off. Trust me—staying ahead of it is a whole lot cheaper and a whole lot less stressful than scrambling around a leak at midnight.
A simple maintenance routine is your best shot at getting the full lifespan out of that concrete tile roof. It protects what you've put into the house, and it means you stop worrying about it.
That mirrors where the whole industry is heading, too. There's a big push toward sustainability and durability, driven by tougher building codes and homeowners who've wised up. It's a big part of why skilled maintenance is in such demand. You can read more on how sustainability trends are shaping the roofing market on MordorIntelligence.com.
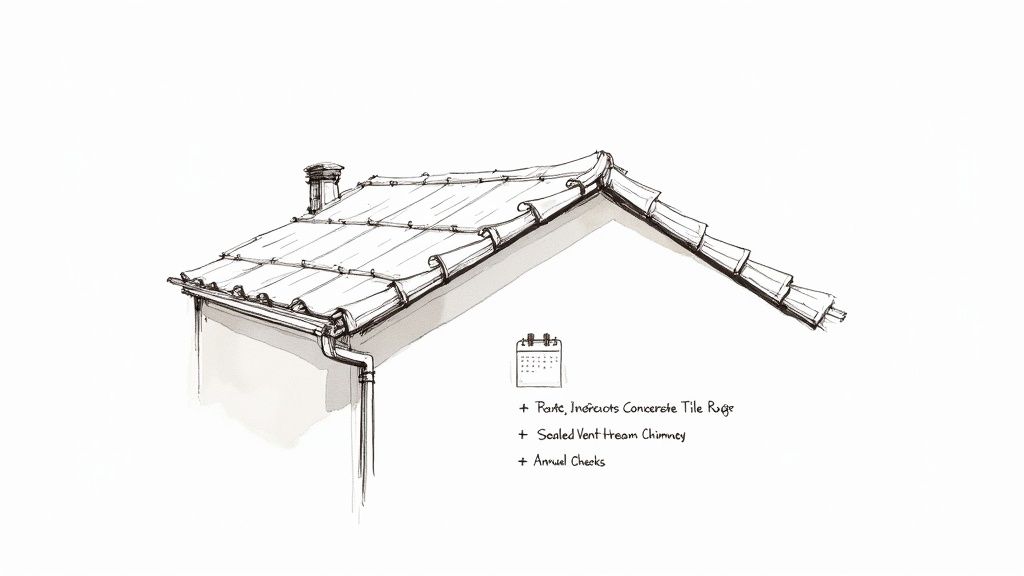
Your Biannual Maintenance Checklist
You don't have to camp on your roof to keep it healthy. A quick look from the ground twice a year usually catches trouble before it turns serious. Spring and fall are the times I'd pick.
Here's a routine anybody can run:
- Walk the Perimeter: Binoculars out, scan the tiles. You're after new cracks, tiles that have shifted, or corners chipped off since the last time you looked.
- Check the High-Risk Spots: Eyeball the flashing and sealant around chimneys, vents, and skylights. Leaks love these transition points. Look for cracking, peeling, or gaps.
- Inspect the Gutters: After a good rain, make sure water's running free. Clogged gutters back water up under the edge of your tiles, and that quietly rots your underlayment while you're none the wiser.
A healthy roof keeps the whole house healthy. Put in a couple hours a year on maintenance and you head off the slow-motion water damage that ends in massive structural repairs.
The Importance of Clean Gutters
Of everything on the list, keeping your gutters and downspouts clear is probably the biggest one. Choke them with leaves and debris and they just can't move water anymore.
Then water pools at the edge of your roof and wicks up under that first row of tiles. Steady moisture like that is the worst thing for your underlayment and the wood decking under it.
A little money on gutter guards or a seasonal cleaning is one of the smartest moves you can make. Call it preventative medicine for the house.
Answering Your Concrete Roof Repair Questions
Even with a solid plan, a concrete tile roof repair raises questions. That's normal. Here are the ones we hear most from homeowners, with straight answers so you know what you're walking into.
Can I Walk On My Concrete Tile Roof To Do Repairs?
This is the big one. You can technically walk a tile roof, but we'd steer you away from it unless you really know what you're doing. Concrete tiles are tough and brittle at the same time. Plant your boot wrong and you'll hear that crack you don't want to hear.
If you absolutely have to be up there, keep to the bottom third of each tile. That's the sweet spot, where the tile overlaps the one below and the batten underneath gives it the most support. And never go up without real safety gear—a harness anchored solid to the roof structure. No exceptions on that one.
How Much Does Repairing A Concrete Tile Roof Cost?
Cost swings a lot depending on the damage and whether you do it yourself or call someone.
- DIY Repair: Swapping a few cracked tiles, you can usually keep it between $50 and $150 for replacement tiles and a decent roofing adhesive.
- Professional Repair: Bringing a roofer in for a small job tends to start around $300 to $600. It climbs with how steep and tall the roof is and how fiddly the repair gets.
If the damage is everywhere, or you think the underlayment's involved, the price goes up a good bit and it really needs somebody to come look.
A roof repair, big or small, can feel like a lot to take on. Having someone reliable to call for a quote—or just a straight answer—makes it easier. If you're unsure, pick up the phone and ask. We don't mind.
How Do I Find An Exact Match For My Old Roof Tiles?
This is usually the most maddening part of the whole job. Matching an older tile can feel like a treasure hunt with no map.
First move: carefully pull a broken tile and flip it over. Look for a maker's name, a logo, or a model number stamped in the concrete. That's your best lead.
Then get your phone out and shoot clear photos from every angle—top, bottom, and a side shot to catch the curve. Don't bother with the big-box stores; they just don't stock the profiles you need for repair work. Take your photos and a chunk of the broken tile to a real roofing supply house instead. Those folks do this all day and can often name an old tile or steer you to a match.
When you can't track down the right materials, or the repair starts feeling over your head, bringing in someone who does this for a living is the fastest way through it. You can always contact our team at Sunrise Roofers for a little guidance or to set up an inspection.
When you want it done right the first time, give Sunrise Roofers LLC a call. We're a family shop—you call, you get Eddie, not a closer—and we handle roofing across the Greater Tucson area. Head to https://roofwithsunrise.com for your free, no-obligation estimate today.
Need roofing services in Tucson? Request a free inspection or call 520-753-1758. Related pages: Roof Repair · Roof Replacement · Service Areas.
Published by Sunrise Roofers LLC
Licensed & Insured Roofing Contractor · Tucson, AZ