A Homeowner's Guide to Tile Roof Repair
By Sunrise Roofers LLC · Nov 25, 2025 · 16-24 min read
A tile roof takes a beating from the Tucson sun and the monsoon and keeps on going. Tough stuff. But even the toughest armor needs somebody to look after it now and then. A tile roof repair is more than swapping a cracked tile here and there. It's making sure the whole system's sealed tight so water never reaches the underlayment, which is the layer actually keeping your house dry.
Let a little problem ride, and you're asking for real water damage and a repair bill three times the size down the line.
Understanding Why Your Tile Roof Needs Repair
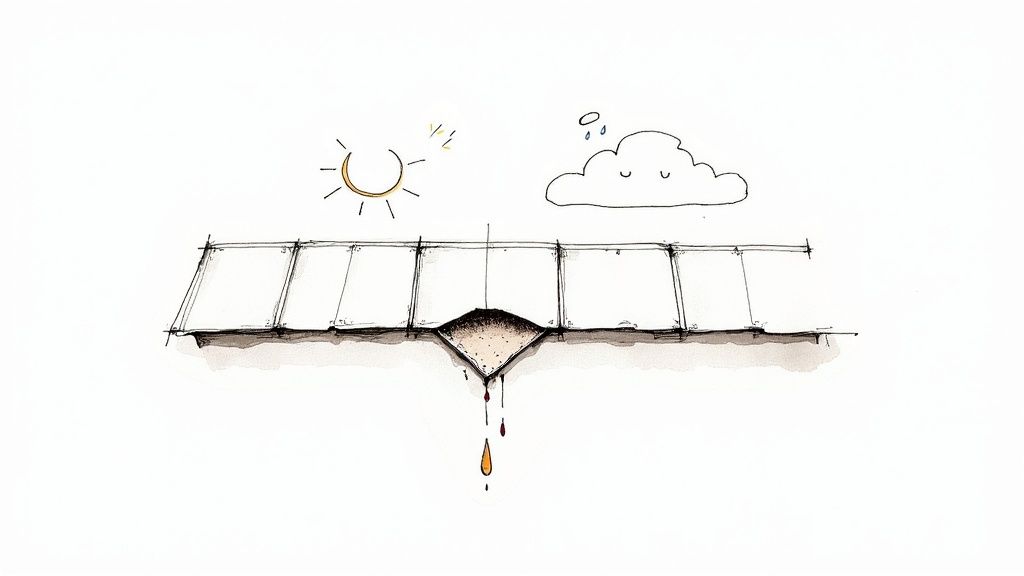
Picture your tile roof as a suit of armor. Each tile's a plate, lapping over the next one, shedding rain and sun and whatever blows up there. Strong as it is, it's not bulletproof. One cracked or slipped tile is a chink in that armor—suddenly water's got a straight shot past the top defense and into the soft layers underneath.
That layer underneath, the underlayment, is the real waterproofing. The tiles are mostly there to take the UV and the impacts so the underlayment doesn't have to. Lose a tile and that underlayment's left facing weather it was never built to face alone. It breaks down fast. Then it leaks.
The Common Culprits Behind Tile Damage
A handful of usual suspects do most of the damage. Know them and you'll catch trouble before it spreads.
- Weather: Years of hard sun turn tiles brittle. Then a monsoon gust comes through and peels them up like nothing. Hail's the more obvious one—it leaves cracks and impact spots you can spot from the ground.
- Foot Traffic: Somebody stepping wrong on a tile roof is about the fastest way to crack one. That's exactly why you want pros up there, guys who know where to put their weight and how.
- Debris: Leaves and twigs off your palo verde pile up in the valleys. That gunk holds moisture against the roof, rots the underlayment, and dams the water up until it finds a way in.
To help you size up what you're seeing, here's a rundown of the common problems and how worried you should actually be about each one.
Common Tile Roof Problems and Their Urgency
| Problem | Visual Cues | Urgency Level | Potential Consequence |
|---|---|---|---|
| Cracked or Broken Tiles | Visible fractures, chips, or completely shattered pieces. | High | Direct water path to the underlayment, leading to rapid leaks. |
| Slipped or Dislodged Tiles | Tiles that have slid down, exposing the underlayment above. | High | Exposes underlayment to UV damage and creates a clear entry for rain. |
| Missing Tiles | An obvious gap in the tile pattern. | Critical | The most severe exposure; immediate leak risk during the next storm. |
| Debris in Valleys | Piles of leaves, dirt, and branches in the channels of the roof. | Medium | Traps moisture, accelerates underlayment decay, and can cause water damming. |
| Damaged Ridge Caps | Cracked or loose tiles along the peak of the roof. | High | Compromises the roof's highest point, allowing wind-driven rain to enter. |
Spot any of these and it's time to move. A small fix today beats tearing into your structure tomorrow. Every time.
The Financial Reality of Tile Roof Repair
I'll give it to you straight: fixing tile costs more than fixing shingles. The material's heavy, it's fragile, and it takes a real touch to handle. This is not a job for the handyman with a truck.
Most folks land somewhere between $1,200 and $2,800 for a pro repair. Where you fall depends on how much is broken and how tough the roof is to get to. There's more on why fixing broken roof tiles matters so much in our desert climate if you want to dig in.
Either way, jumping on it the day you notice is how you protect the roof and get every year out of it you paid for.
How to Spot and Assess Roof Tile Damage Safely
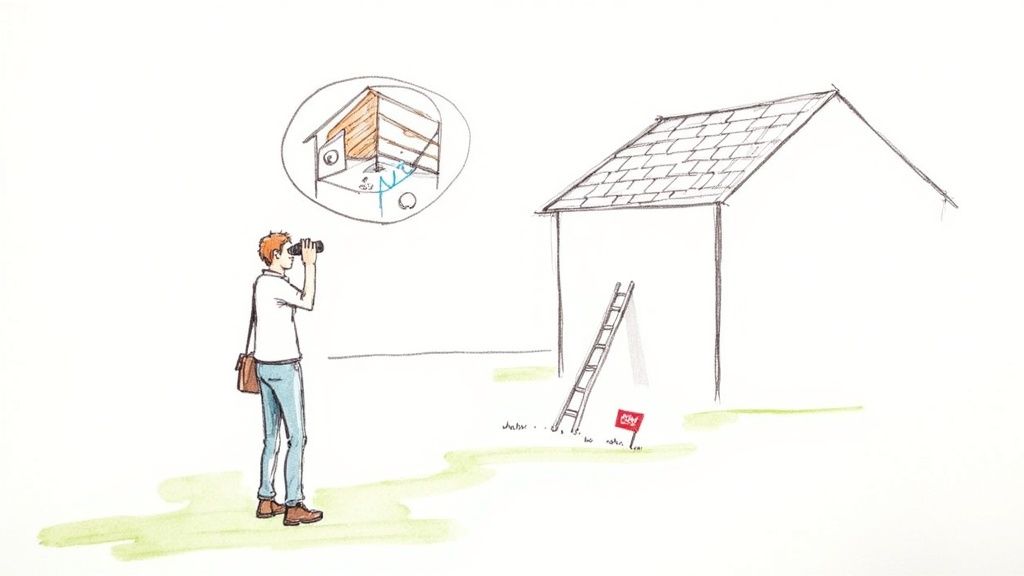
Catch tile damage early and you stop a cheap fix from turning into a giant one. And here's the good news—you don't need to climb up there to do it. Actually, please don't. We see too many folks end up in the ER over a roof inspection.
A smart inspection starts with both feet planted on the ground. Play detective. Some clues jump right out at you, but the quiet ones tell you just as much about how your roof's holding up.
The Ground-Level Walkaround
Start with a simple lap around the house. Cross the street first for a clean look at the whole roof, then walk the perimeter. Grab a pair of binoculars—they're your best friend here, getting you a close-up without putting you on a ladder.
As you go, watch for these:
- Cracks and Chips: Fractures on the corners and edges of tiles. Classic hail damage, or a branch that came down in a windstorm.
- Slipped Tiles: See any tiles that have slid down and left the dark underlayment paper showing? Drop everything. That's water's open door right there.
- Debris in Valleys: Look hard at the V-shaped channels where two roof planes meet. Piled-up leaves and dirt dam the water, trap the moisture, and rot the underlayment underneath.
- Efflorescence: On concrete tile you might see a white, chalky residue. That's efflorescence—water soaks into the tile, evaporates, and leaves the salt behind. It means the tile's gone porous and it's holding too much water.
That ground-level look gives you a good baseline. Catch even one of these and it's time to get a closer set of eyes on it.
A pro inspection confirms what you saw from the ground and digs up the stuff you couldn't. We know the difference between a cosmetic scuff and something that's actually threatening your house, so nothing slips by.
The Attic Investigation
Once you've worked the outside, head indoors—up to the attic. Pick a bright, sunny day, climb up, and kill the lights. You're after two things.
First, look along the underside of the deck for any daylight poking through. Even a pinhole means water's got a path straight into your house come the next rain. That's usually the first sign of a slipped tile or a tear in the underlayment.
Second, grab a good flashlight and go over the decking, the rafters, and the insulation, looking for:
- Water Stains: Dark streaks or brown rings on the wood. That's flat-out proof there's a leak, past or present.
- Sagging Decking: Does the deck look like it's bowing or dipping between the rafters? A leak's been working on that wood a long time, rotting it soft.
- Damp or Moldy Insulation: Feel for insulation that's wet, or check for black or green mold creeping in.
Find any of these in the attic and you've got proof the outside problem is already chewing on the inside. Now it's not just smart to call a pro, it's the only move. You can see how our roof inspection process works and what we look for around Tucson. Getting ahead of it like this is the best thing you can do before the monsoon shows up.
Before any roofer touches a repair, they've got to know what they're dealing with. A tile roof isn't just those pretty curved pieces you see from the street—it's a whole system. Every piece of it was picked for a reason, to handle everything from the desert sun to a monsoon dumping rain sideways.
So figuring out what you've got comes first. It's like a mechanic with the hood up—you don't just swap a random part and cross your fingers. Different tiles have different strengths, different weak spots, and they each get fixed their own way.
The Big Three Tile Materials
Around Tucson you'll pretty much always find one of three tiles up there. Each one's got its own personality, and each takes a different touch to fix.
- Clay Tiles: The classic—the terracotta that says Southwest the second you see it. Tough as anything, and they'll go over 100 years if you look after them. Catch is, they're brittle. A real hailstorm or somebody stepping wrong will crack them clean through.
- Concrete Tiles: The workhorse. You can shape and color concrete to mimic just about anything, clay or slate included, for less money. Figure a solid 50 years or more. Strong, but they go porous as they age, soak up moisture, and leave that chalky white efflorescence behind.
- Slate Tiles: The top of the line. Real stone, a look nothing else touches, and a lifespan that can run past 150 years. But it's heavy, it's pricey, and installing it is its own specialty. Won't burn, won't rot—though over time the layers can flake apart, what they call spalling.
Knowing your tile is step one. But honestly? The part of the repair that matters most is happening down underneath those tiles.
The Unsung Hero: The Underlayment
If the tiles are the armor plating, the underlayment is the chainmail under it. It's the actual waterproof barrier on your roof. A cracked tile's a problem, no argument. But a torn underlayment? That's a leak, guaranteed.
The underlayment is what actually keeps water out of your house. The tiles are mostly there to shield that membrane from the UV and the impacts. Any "repair" that doesn't check and fix the underlayment is just a Band-Aid slapped on top.
That's exactly why the quick "slap and seal"—where a guy just glues your broken tile back together—falls apart. If the underlayment under it was already brittle or torn, the leak's coming right back. A real repair means pulling the tiles in that spot, getting a clean look at the waterproofing layer, fixing it the right way, then setting the tiles back down.
The Growing Importance of Quality Materials
Homeowners and builders are wising up. As codes tighten, more people want better, tougher roofing material—and that's especially true for good underlayment. The numbers show it. The global market for roofing and tile underlayment sat around USD 31.0 billion in 2025 and is headed for USD 51.5 billion by 2035, climbing a steady 5.2% a year.
The full roofing tile underlayment market report has the details if you want them. That growth isn't just a stat—it's the whole industry moving toward building roofs that last from the ground up. And it all starts with the underlayment.
The Professional Tile Roof Repair Process Step by Step
A real tile repair isn't a patch job. It's closer to surgery. Methodical, careful, and aimed at putting the whole roof system right—not just hiding the part you can see. Once you know the steps, you can tell good work from a rush job, which makes sorting through quotes a whole lot easier.
It starts with a hands-on look from up on the roof. This is where a pro gets past whatever you could see from the driveway, going over the damaged area and the tiles all around it. Not just the obvious cracks—he's hunting the quiet stuff too, loose tiles or bad flashing that point to a bigger problem hiding underneath.
Think of your roof as layers of defense, one under the next. Here's how a roofer sees it.
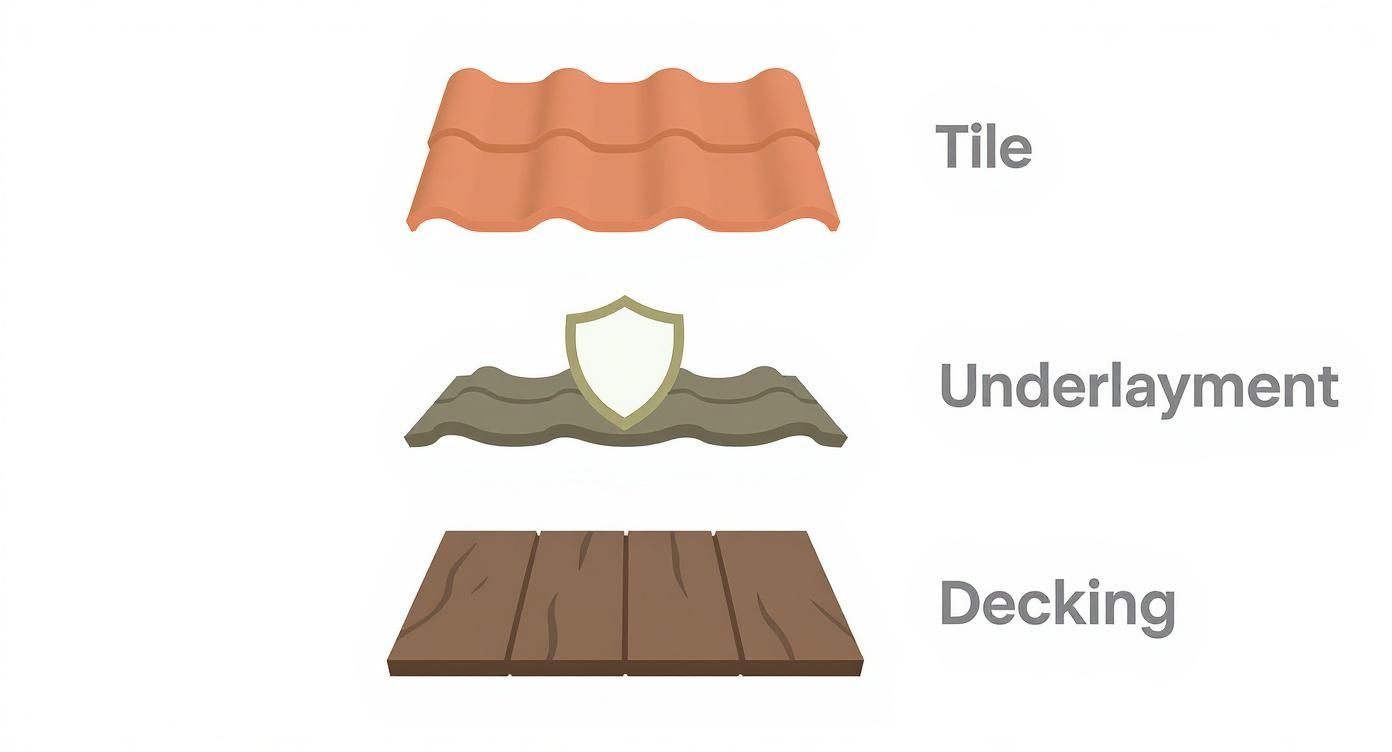
The tiles are the armor, no question. But the underlayment? That's the waterproof shield doing the real work of keeping your house standing dry.
Removing Damaged Tiles with Precision
Once we know the scope, the first real step is pulling the broken tiles and the ones around them. Delicate work, this. You can't just yank a cracked tile loose—do that and you'll crack the interlocking tiles next to it, every time.
So a good roofer uses the right tools to lift the overlapping tiles above the repair just enough to slide the broken pieces out clean. The good tiles get stacked off to the side, ready to go back on. That careful, slow hand is exactly how you spot a real pro—and how a small fix stays small instead of becoming a big one.
Repairing the Critical Underlayment
Tiles out of the way, now the underlayment's showing. This is the moment of truth. We go over that waterproofing layer top to bottom—tears, brittle spots, water stains, all of it. And nine times out of ten, when a tile's been broken a while, the underlayment under it needs work too.
The fix here is simple, but you can't skip a step:
- Cut Away the Bad Stuff: Every bit of shot underlayment comes out, cut back to clean, dry, solid wood.
- Clean the Deck: The bare deck gets swept of debris and old nails so the new material lands on a smooth surface.
- Lay New Underlayment: A fresh piece goes down, lapped over the existing material the right way. That overlap is the whole ballgame—it's what makes the seal seamless and waterproof.
You don't skip this step. Not if you want the repair to hold. Skipping it is like nailing a new shingle to a rotten board—looks fine for a minute, then it's right back where it started.
"A real tile repair cares about the layers you can't see just as much as the tile you can. The underlayment decides how long the whole fix holds. Patch only the tile and all you've done is hide the problem."
Setting and Securing the New Tiles
Underlayment's sound, now the tiles go back. Reverse order from how they came off—bottom row first, working your way up. Each tile slides back into its spot and has to lock in tight with the ones beside it.
If we need new tiles, a good roofer matches the color and the profile as close as he can get. And every new tile goes down to current code, usually held with foam adhesive, mortar, or clips so it doesn't go flying the next time the monsoon winds kick up.
How much of this material people are buying says a lot about where construction and repair are headed. The global roofing tiles market hit USD 20.85 billion in 2025 and keeps climbing, mostly off re-roofing jobs. And sometimes the damage is just too far gone for a patch—at that point a full replacement is the cheaper move over the years. Our guide walks through what's involved in a full concrete tile roof replacement if that's where you're headed.
Last thing, we check whatever else ties into that area—flashing around the vents and chimney—to make sure it's sealed up tight. Then a real cleanup, the kind that leaves your yard looking like nobody was ever there. Except for that fixed, leak-free roof over your head.
Deciding Between DIY Repair and Hiring a Professional
It's tempting, I know. You spot one cracked tile and that DIY voice pipes up: how hard can it be? With tile, though, the gap between a quick fix and an expensive mistake is razor-thin. Truth is, almost every tile problem belongs to somebody who's done it a hundred times.
Here's the line. Sealing a hairline crack on a tile over your back patio? A handy homeowner can probably swing that. But the second you've got to walk the roof, lift a tile, or deal with anything past a cosmetic chip, the risk goes through the roof—pun intended. Tile looks simple from the ground. It isn't.
Why DIY Tile Roof Repair Is So Risky
Walking a tile roof without busting more tiles is a skill you learn the hard way. Clay and concrete are brittle, and one bad step cracks three or four around it—now your $200 problem is a $2,000 one. Pros know exactly where to put their feet, and that's a feel you only get after years up there.
And breaking more tiles is just the start. You hit other walls too:
- Color Matching is Brutal: Our sun fades tile over the years into a color you'll never match off a shelf at the big box store. A mismatched tile screams "DIY gone wrong." We've got tile boneyards and suppliers a homeowner can't get into.
- The Underlayment is Everything: Again, the waterproofing isn't the tile—it's the membrane under it. A DIY patch that ignores a bad underlayment fails, period, and you won't know until water's coming through your ceiling. Sealing that layer right is the whole job.
- Safety Comes First: The big one is falling. No harness, no gear, no training—a fall off a roof can change your life in a second. Whatever you'd save isn't close to worth it.
A pro roofing job isn't about swapping one broken tile. It's about the whole roof holding up for the long haul—a sound underlayment, tiles set tight enough to take a monsoon wind, and a real warranty standing behind all of it.
DIY vs. Professional Tile Roof Repair: A Head-to-Head Comparison
To make the call easy, here's what you're actually weighing—doing it yourself versus picking up the phone for a certified crew. No guessing, just how it tends to shake out in the real world.
| Factor | DIY Approach | Professional Service |
|---|---|---|
| Safety | High Risk. Involves working at heights without professional safety gear, risking falls and serious injury. | Low Risk. Licensed contractors are insured and use proper safety equipment like harnesses and ropes. |
| Quality of Repair | Variable. Often lacks the skill to properly repair underlayment and secure tiles, leading to future leaks. | High Quality. Experts ensure the underlayment is sealed and tiles are correctly installed for a permanent fix. |
| Cost | Lower initial cost for materials, but high potential for causing more damage and facing bigger bills later. | Higher upfront cost, but provides a lasting solution that prevents more expensive repairs down the road. |
| Warranty | No warranty. If the repair fails, all costs for fixing the leak and any resulting water damage are on you. | Workmanship Warranty. A reputable roofer stands by their work and comes back if anything's off. |
Look, the DIY itch is a good thing—I respect it. But a tile roof is too complicated and too unforgiving to learn on. For a fix that's safe and actually lasts, paying for somebody who knows the work is the smart money. See a problem, get a real set of eyes on your tile roof repair in Tucson—it'll save you a pile of grief and cash both.
How to Choose the Right Roofing Contractor
Picking who fixes your tile roof is the biggest decision in this whole thing. It's not about hunting down the lowest bid. It's about handing a critical part of your home to somebody you trust.
A good roofer's a partner looking out for your house. A bad one turns a simple repair into a bigger, pricier mess than you started with. The right guy takes the time to show you the damage, walk you through the fix in plain English, and answer every question without leaning on you to sign.
Verifying Credentials and Experience
Before you even glance at an estimate, do a little homework. This first pass is what keeps the unqualified guys and the fly-by-night outfits off your property.
Start with the stuff that's not up for debate:
- License and Insurance: First thing—make sure they've got a valid Arizona license, general liability, and workers' comp. That's what keeps you off the hook if something goes wrong on your property.
- Tile Experience: Ask them flat out: "How many tile roofs have you fixed this year?" Tile is a whole different animal from shingles. You want a crew that does this all the time, not once in a while.
- Local Roots: Find a roofer who's been around Tucson a while. A local guy knows our weather cold—the sun that eats underlayment, the monsoon winds that love peeling tiles right off.
Get those basics squared away and you've got some trust to build on before you go any further.
"A detailed, line-by-line estimate is the mark of a contractor with nothing to hide. Vague quotes tend to bury shortcuts, so get the materials, the labor, and the warranty spelled out before you sign a thing."
Evaluating Quotes and Asking the Right Questions
Once you've got a short list of contractors who check out, line up their proposals. A good estimate is way more than a price—it's the whole map of how the repair's going to go.
As you go through each quote, have these ready:
- What underlayment are you using, and why that one? Cuts right to it. Tells you fast whether they care about the most important layer or they're just thinking about the tile.
- How are you matching the new tiles to my roof? A seasoned guy has a real answer for sourcing tile that blends in, not a shrug.
- What's your workmanship warranty cover, and how long? You need to know what you're protected for beyond the manufacturer's warranty on the material itself.
What you want is an outfit that answers those straight and sure, not one that hems and haws. To get a feel for what a top-notch roofer looks like, read up on the principles that guide a reliable Tucson roofing team and hold the rest to that bar. Hire with your eyes open and your tile roof gets done right the first time.
Still got a few things rattling around in your head? You're not the only one.
Common Questions About Tile Roof Repair
Even with the plan laid out, you'll have questions about getting your tile roof fixed. That's normal. Straight answers make it easier to move ahead. Here's what homeowners around Tucson ask us most.
How Long Does a Typical Tile Roof Repair Take?
Comes down to one thing—how much is broken. A few cracked or slipped tiles? A good crew knocks that out in a few hours. Easy day.
But if the inspection shows the underlayment's shot, now we're talking bigger. Replacing that waterproofing means pulling up a whole section of tile, and that runs anywhere from one to three days. And around here we're always watching the sky—monsoon rain or hard wind, we stop, because doing it right and doing it safe beats doing it fast.
Can You Perfectly Match New Tiles to My Old Ones?
Matching new tile to a roof that's been cooking in the desert sun for years is a real challenge, but we can almost always pull it off. Clay and concrete both fade and shift color as the years go by. That's just what they do out here.
We've got a whole network of suppliers, including yards that deal in salvaged tile. Those reclaimed pieces are often a dead-on match for an older roof. If your house is newer, finding an exact match is usually a breeze.
And when a perfect match just isn't out there, we've got a trick. We put the new tiles somewhere nobody sees, like the back slope. Then we pull the old weathered tiles off that spot and use those for the repair up front. Your curb side ends up looking like nothing ever happened.
What Is the Average Lifespan of a Repaired Tile Roof?
Done right—good material, somebody who knows the work—the patched part lasts every bit as long as the rest of your roof. A tile roof installed properly in Tucson is built to go 50 years or more.
The whole secret is sealing that underlayment perfectly and blending the new tiles in clean. A pro repair isn't a temporary patch. It's a permanent fix that puts your roof back to whole. And any roofer worth hiring backs the work with a real warranty, so you're not lying awake wondering if it'll hold.
Spotted trouble on your roof? Don't wait for the next monsoon to see if it leaks. The owner-led team at Sunrise Roofers LLC provides clear, photo-documented inspections and honest, line-item estimates to help you understand your options. Schedule your free, no-pressure roof evaluation today.
Need roofing services in Tucson? Request a free inspection or call 520-753-1758. Related pages: Roof Repair · Roof Replacement · Service Areas.
Published by Sunrise Roofers LLC
Licensed & Insured Roofing Contractor · Tucson, AZ